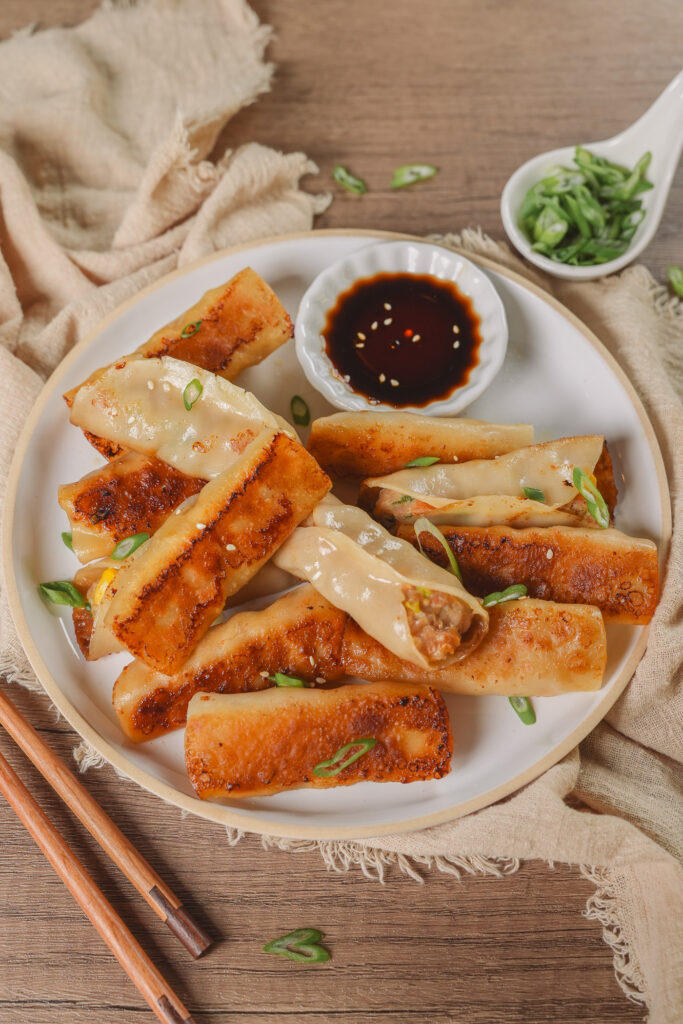
Imagine biting into a perfectly golden-brown crescent, its bottom irresistibly crispy, giving way to a tender, chewy wrapper that encases a burst of savory, juicy filling. This isn't just a fantasy; it's the delicious reality of homemade potstickers, and you're about to discover how incredibly easy they are to master in your own kitchen. Often seen as a restaurant-only delicacy, these pan-fried and steamed dumplings are surprisingly simple to make, offering a level of freshness and customization that store-bought versions simply can't match. Forget the intimidation; prepare for a culinary journey that promises crispy bottoms and juicy fillings every single time.
The Magic of Homemade Potstickers: Why Bother?
You might be wondering if making potstickers from scratch is truly worth the effort. The answer, unequivocally, is yes! The satisfaction of crafting these culinary delights by hand is immense, and the taste difference is profound. Homemade potstickers boast a vibrant freshness that elevates every bite. You have complete control over the ingredients, allowing you to tailor the filling to your exact preferences, ensuring no unwanted additives and only the highest quality components.
Beyond the superior taste, making potstickers can be a wonderfully social and rewarding experience. Gather friends or family around the kitchen table for a "potsticker party" – the shared task of filling and folding can turn cooking into a cherished memory, filled with laughter and camaraderie. Plus, mastering this recipe means you'll always have a comforting, satisfying meal ready to go. The ability to make a large batch and freeze the extras is a game-changer for busy weeknights or impromptu gatherings, ensuring you’re always prepared to impress.
Crafting the Perfect Potsticker Filling: Flavor First
The heart of any great potsticker lies in its filling. A well-balanced filling combines fresh vegetables with your choice of ground meat, seasoned perfectly to create that irresistible juicy interior. While traditional potstickers often feature ground pork, this recipe is incredibly versatile, allowing for delicious adaptations.
Essential Ingredients for a Flavorful Core:
- Ground Meat: While ground pork is classic for its rich flavor and fat content, ground turkey or chicken work beautifully for a leaner alternative. Many home cooks even blend different meats to achieve a complex flavor profile. Don't be afraid to experiment with what you love!
- Napa Cabbage: Finely shredded, Napa cabbage adds a subtle sweetness and crucial moisture to the filling. It also helps bind the ingredients together.
- Carrots: Grated carrots provide color, a touch of sweetness, and additional texture.
- Green Onions (Scallions): These deliver a mild, oniony bite and a fresh aroma.
- Fresh Ginger: This is non-negotiable! Finely minced fresh ginger imparts a warm, zesty, and highly aromatic kick that is essential to authentic potsticker flavor. Skip the jarred stuff; its dullness pales in comparison to the vibrant punch of fresh ginger.
- Fresh Garlic: Similarly, fresh garlic offers an unparalleled pungency and depth. While not always in the traditional spotlight for potstickers, a hint of fresh, minced garlic can elevate your filling significantly.
Seasoning Secrets for a Juicy Filling:
Once your vegetables are prepped and your meat is ready, it's time to bring it all together with the right seasonings. A simple combination typically includes soy sauce, sesame oil, a pinch of white pepper, and sometimes a touch of rice wine or mirin for added depth. The key is to thoroughly mix everything, ensuring the flavors are evenly distributed. Don't be afraid to use your hands – it's the best way to ensure a cohesive and well-seasoned filling. The goal is a mixture that holds together without being too wet or too dry, promising a juicy burst of flavor with every bite.
The Art of Folding Potstickers: Simple Steps for Impressive Pleats
The thought of folding potstickers can seem daunting, but rest assured, it’s much simpler than it looks. There's no need for perfection; even rustic, simply folded dumplings taste incredible. The key is to securely seal the filling inside the wrapper.
Step-by-Step Folding Guide:
- Prepare Your Workspace: Lay out your round potsticker wrappers (store-bought are perfectly fine and convenient!) and have a small bowl of water nearby.
- Place the Filling: Hold a wrapper in the palm of your hand. Place about a tablespoon of filling (don't overfill!) in the center of the wrapper.
- Moisten the Edge: Dip your finger in water and moisten half of the wrapper's edge.
- Fold and Seal: Fold the wrapper in half to create a semi-circle, bringing the dry edge over to meet the wet edge. Pinch the center of the seam firmly to seal.
- Create the Pleats: Starting from one side of the pinched center, create small pleats along the front edge of the wrapper, pressing each pleat firmly against the back, unpleated edge. Work your way to the end, then repeat on the other side of the center. This creates the classic pleated crescent shape. Alternatively, a simple crimp with a fork along the sealed edge works just as well for beginners!
The beauty of homemade potstickers is that even if your pleats aren't perfect, they will still cook up beautifully and taste amazing. With a little practice, you'll be pleating like a pro in no time!
Cooking Your Potstickers to Perfection: The Crispy-Steamed Method
This is where the magic truly happens – transforming your raw dumplings into the iconic crispy-bottom, juicy-filled potstickers. The technique involves a two-stage cooking process: pan-frying for that glorious golden-brown crispness, followed by steaming to cook the filling through and tenderize the wrapper. This method is what gives potstickers their unique texture and flavor profile.
The Potsticker Technique Demystified:
- Heat the Oil: In a non-stick skillet (a good quality one is key for non-stick success), heat about 1-2 tablespoons of canola or other neutral oil over medium heat.
- Sear for Crispy Bottoms: Carefully arrange your potstickers in a single layer in the hot oil, ensuring they don't touch. Cook uncovered for 3-5 minutes, or until their bottoms are beautifully golden brown and crispy. Keep a close eye to prevent burning.
- Steam for Juiciness: Once the bottoms are crispy, it’s time to steam. Carefully pour about 1/4 cup of water into the skillet (use 1/3 cup if cooking frozen potstickers). Be careful! The water will sizzle and pop vigorously. Immediately cover the skillet tightly with a lid to trap the steam.
- Cook Through: Let the potstickers steam for 5-8 minutes, or until the water has evaporated and the wrappers appear translucent and cooked through. The steam ensures the filling is perfectly cooked and juicy.
- Crisp Up (Optional but Recommended): Once the water has mostly evaporated, remove the lid. If there's still a little water left, let it evaporate with the heat turned off or very low, allowing the bottoms to re-crisp slightly. This step ensures maximum crispness.
And just like that, your homemade potstickers are ready! Serve them immediately with your favorite dipping sauce (a simple mix of soy sauce, rice vinegar, a dash of sesame oil, and chili flakes is always a winner). They pair wonderfully with steamed Jasmine rice or a fresh vegetable side.
Freezing for Future Feasts: Smart Meal Prep
One of the greatest advantages of making potstickers from scratch is how incredibly well they freeze. This makes them an ideal candidate for meal prepping, ensuring you have delicious, homemade meals ready in minutes, even on the busiest days. You can make a large batch ahead of time and cook them straight from frozen, making them perfect for quick weeknight dinners or effortlessly elegant party appetizers.
How to Freeze Your Potstickers:
- Flash Freeze: Arrange the freshly folded, uncooked potstickers in a single layer on a parchment paper-lined baking sheet. Ensure they are not touching each other to prevent them from sticking together.
- Freeze Solid: Place the baking sheet in the freezer for about 2-3 hours, or until the potstickers are completely frozen solid.
- Store Properly: Once frozen, transfer the potstickers into freezer-friendly zippered plastic bags or airtight containers. Be sure to label them with the date to keep track of freshness. They can be stored for up to 2-3 months.
When you're ready to cook your frozen potstickers, simply follow the same cooking method as fresh ones, but increase the initial pan-frying time by a minute or two, and use 1/3 cup of water for steaming instead of 1/4 cup. This slight adjustment ensures they cook through perfectly from their frozen state. Having a stash of homemade potstickers in your freezer is like having a secret weapon for quick, delicious meals and impressive entertaining.
Making potstickers at home is a rewarding culinary adventure that is far more accessible than you might think. From the fresh, customizable fillings to the satisfying crunch of their crispy bottoms and the burst of juicy flavor, homemade potstickers offer a taste experience that truly outshines any store-bought alternative. Embrace the process, experiment with flavors, and enjoy the delicious fruits of your labor. You'll not only gain a fantastic new recipe for your repertoire but also create cherished memories along the way. So, roll up your sleeves, gather your ingredients, and get ready to enjoy the best potstickers you've ever tasted!
